Create Schedulestr
Introductionstr
The School Dashboard page is your starting point to create a Timetable. To generate a new Timetable, the following steps need to be done:
Create a new Schedule and choose the Grade(s) for which the Schedule is being created
Add Bell Times (periods) for the Schedule
Add and verify Timetable Rules
Generate Timetable
This page introduces you to how to create a new Schedule. The School may have a single Schedule or different Grades in the School can have different Schedules. Using SchoolPivot Scheduler, one can create multiple Schedules for the same School to support these needs.
Note
Both a School Owner and an Administrator can add Schedule to a School.
Prerequisite: To create a Schedule, you need to first create a School Profile and add School Master Data like Teachers and Subjects etc.. See Enter School Master Data for more information about how to enter School Master Data.
Creating Schedulestr
To create a new Schedule, just click the “Create Schedule” button. A Schedule can be in 3 different states while it is being worked upon - Draft, To Verify, Verified and Completed. When a new Schedule is created, it is Draft. Once Timetable Rules are entered and Verify button is clicked on the Rules page, the Schedule converts to To Verify state. Once all the verification errors are addressed, the Schedule changes to Verified state. Finally, it becomes Completed when Timetable is generated.
Fig. 13 Create a Schedulestr
Schedule Card Viewstr
Once a Schedule is created, they can be viewed as a card on the School Dashboard. Each card displays information corresponding to that Schedule such as name, status, creation and update dates, and summary statistics.
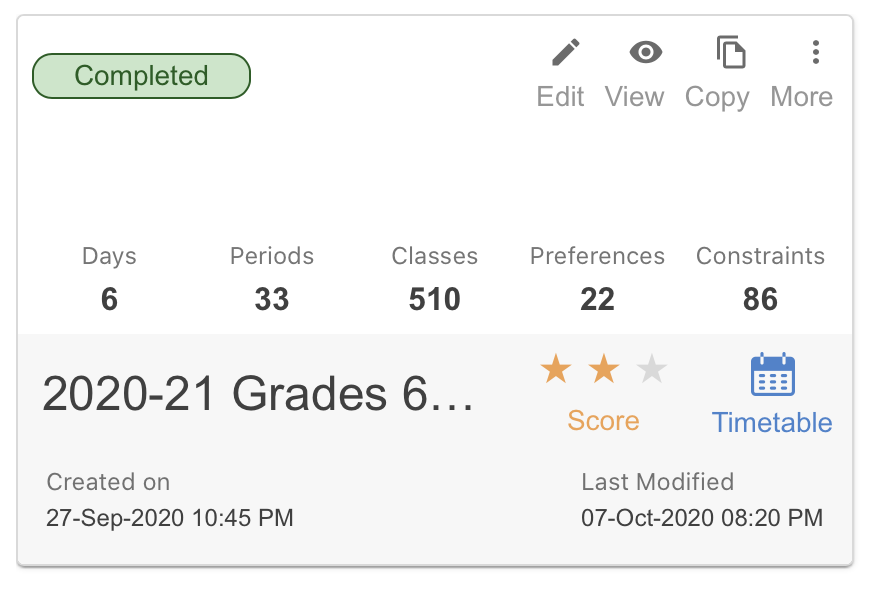
Fig. 14 Schedule Card Viewstr
We will cover the Schedule card in details in the Schedule Card section of the doc after we generate a Timetable. For now, let’s start editing the Schedule.
Editing Schedulestr
After creating a new Schedule you will be automatically taken to the Bell Times page. If you would like to View or Edit an existing Schedule, click View and Edit respectively.